Greeting Cards 2025
Card Series:
- 2021 - maps and multilingual messages
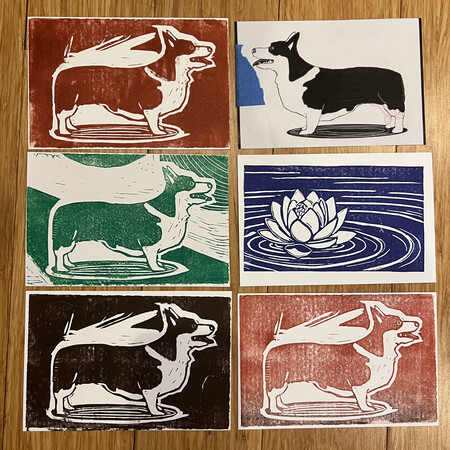
- 2022 - block printed corgis
- 2023 - corgi visual anagram illusions
- 2024 - pixel art fireworks
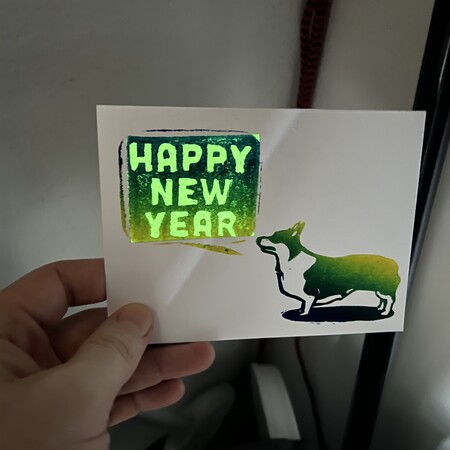
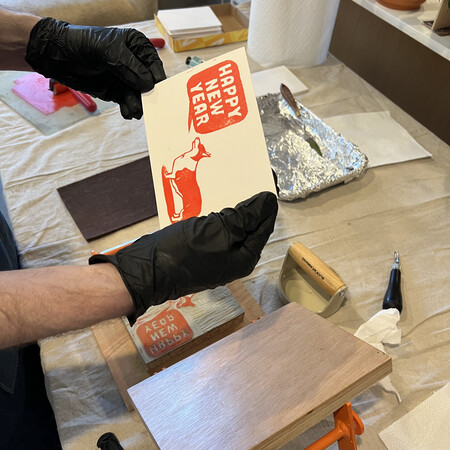
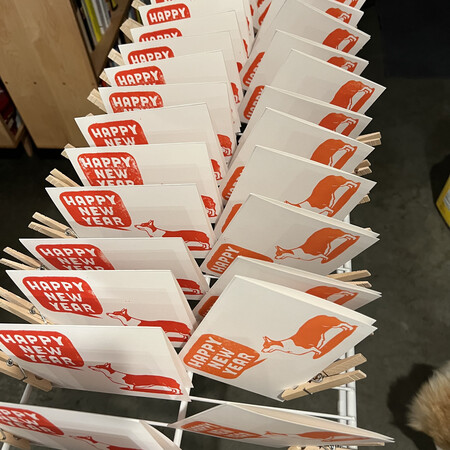
- 2025 - talking corgi linocut
Initial thoughts
Glow in the dark! This year, I want the cards to glow in the dark. I especially want that to be a surprise. Well, suprise to me, glow in the dark is hard!
Ideas and Tests
I had been eyeing the idea of doing glow in the dark for a while now. I’ve had lots of thoughts about how I might get it on the page, the best option seemed to be screen printing. I found lots of options out there for screen printing inks with powerful glow in the dark properties. Many of those inks are meant to be used on fabrics and require heat treating. Since I didn’t want to burn up the cards, I chose a solvent based one instead. Now that I had bought the ink, we just needed to come up with an idea!
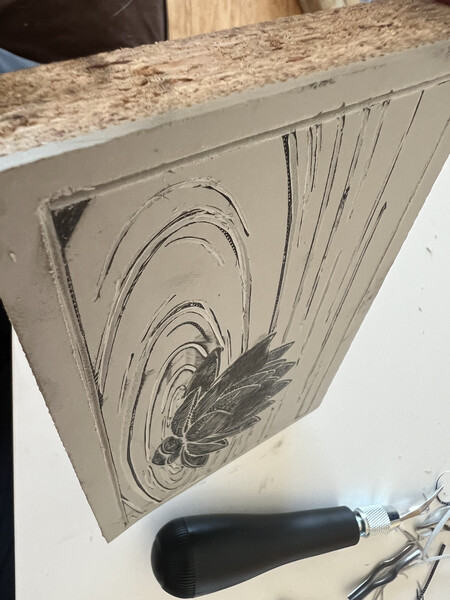
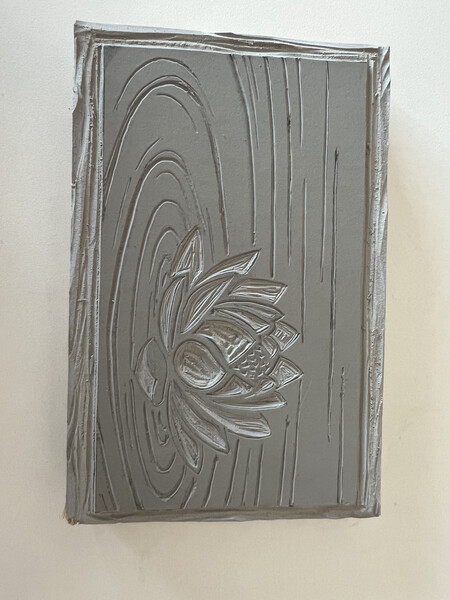
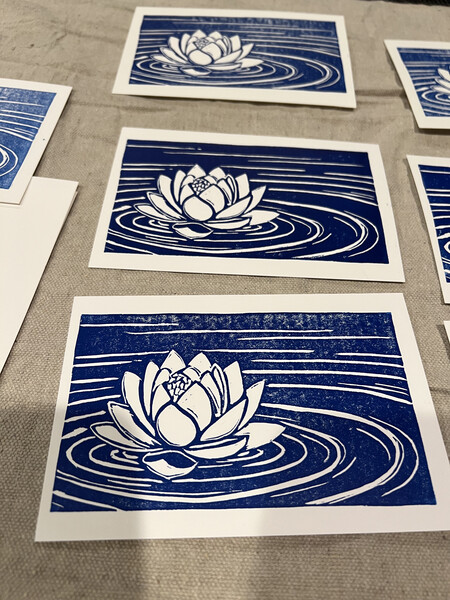
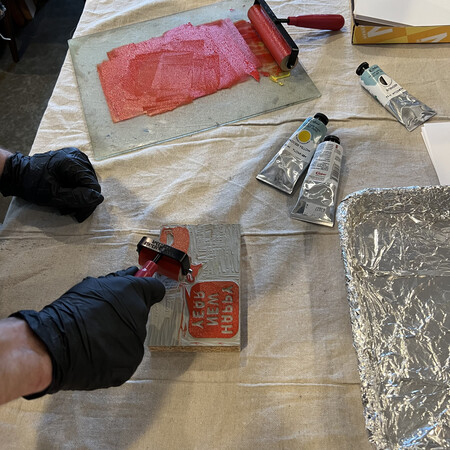
One thing we did this year was go to the open house of a nearby community arts center called PRATT. We saw all kinds of really neat art styles on display from metal casting, glass blowing, jewelry making, and many kinds of printing (including carving into flat rock to then print on paper). One method that really appealed to us was linocut which involves carving away a linoleum plate, then adding some ink and pressing it into paper. This is somewhat similar to our block print cards from 2022, except we 3d printed the plates for those. We wanted this year to be more physical and more handmade.
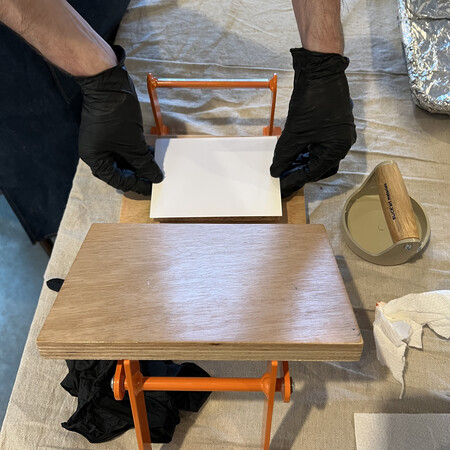
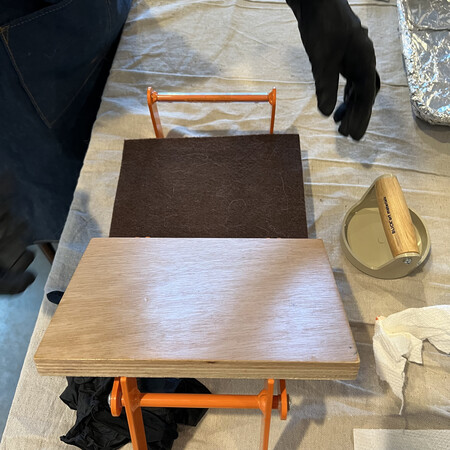
Here are some of the test carvings and prints we did to play around with the process.
Screen printing
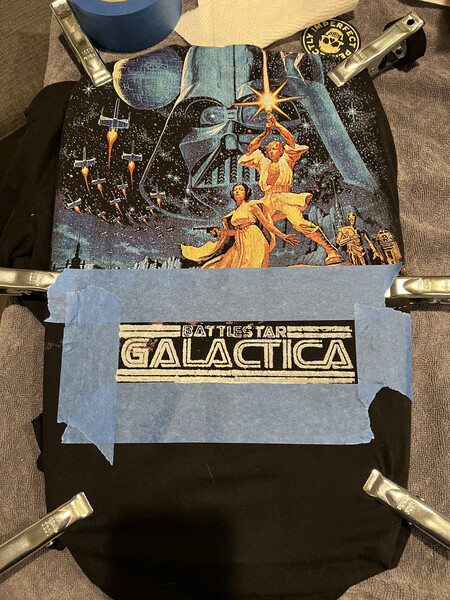
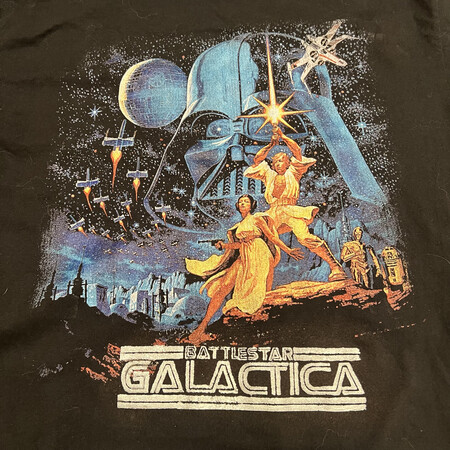
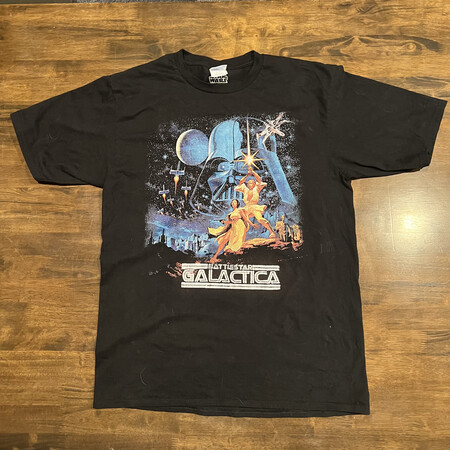
I had previously done a little screen printing for a friend who once shared with me an idea that we both thought was hilarious: What if you had a t-shirt with the classic Star Wars movie poster on it, but instead of “Star Wars” you made it say something wrong like “Battlestar Galactica”.
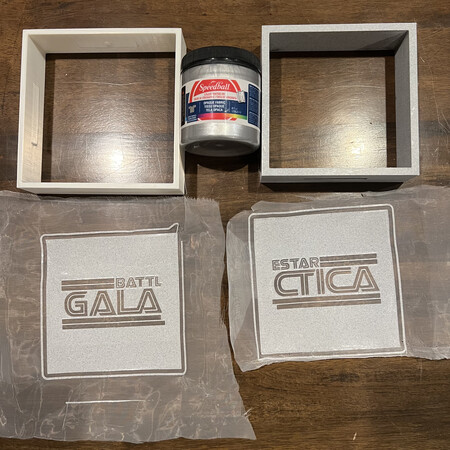
I have done screen printing once or twice, but never really trying to make my own equipment. This time, I 3d printing a screen printing frame I found here. I think the shirt turned out pretty well.
Glow in the Dark, How Hard Could it Possibly Be?
Some things I learned the hard way:
- Solvent based paints can be very nasty. You need a well ventilated area.
- Solvent based paints can dry very quickly, gumming up your printing screen.
- Though they dry fast enough to be problematic, they don’t stop smelling bad for a LONG time, so sometimes you choose to just throw away your printing frame and 3d print a new one.
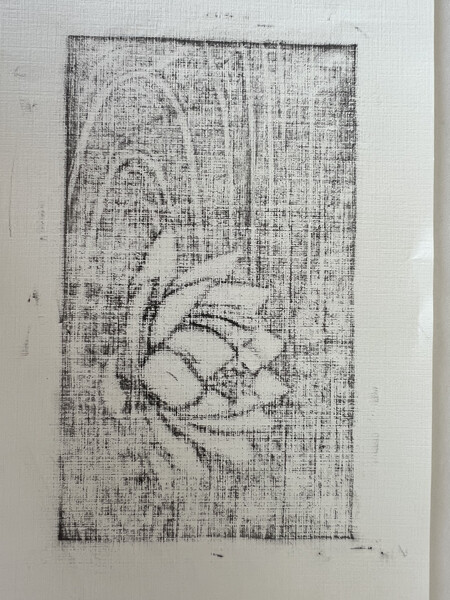
After several tests, I admitted defeat on the glow in the dark paint. It just wasn’t going to be easy enough to use. I tried one last effort for glow in the dark getting some stage tape, but linocut prints are VERY sensitive to relative heights. Printing on the tape was no problem, it looked great, but because the taped area of the card was ever so slightly higher than the rest of the card, the ink wouldn’t touch the paper very well. This meant that we’d either have to have VERY good alignment (which is hard) or not use tape.
We chose the latter.
That said, the very few test prints I successfully made were pretty cool.
Printing
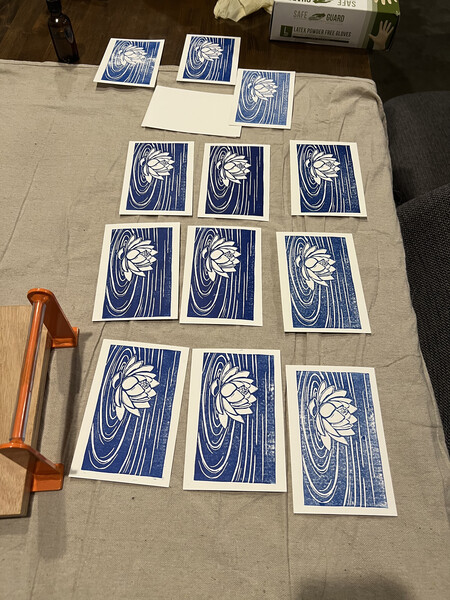
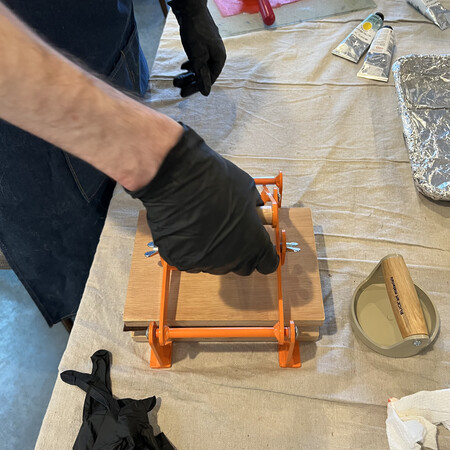
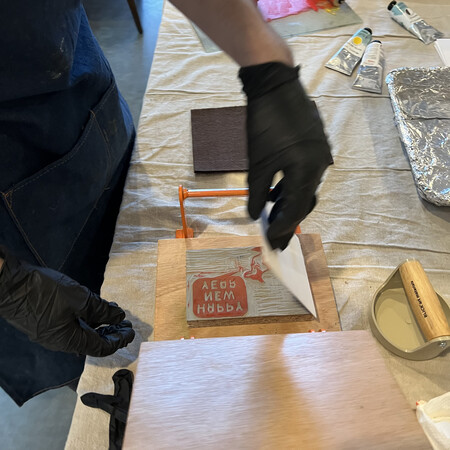
In the end, the process was straightforward and familiar. Ink up the plate, put the paper on top, press it, and carefully remove it. Since it is just the one plate this year, alignment only mattered for aesthetics.
As usual, we used the axidraw to write the insides of the cards, I was able to make them all in a day or two. Then they sat on the table for about two months until we finally got around to printing them. It takes a few hours to cut, score, and fold them all (this year mostly while watching How to Get to Heaven from Belfast which we very much enjoyed).
The actual printing went pretty quickly. We can do 50 or so lino prints in 2-3 hours and it takes 2-3 days for them to dry.

Supplies
Thanks to projects we’ve made in the past, everything used (except the gel pens) was left over from past projects.
In the end, we used the following supplies to make this year’s cards:
- 100lb (270g/m^2) 12x18 inch Neenah Smooth Digital cover paper
- Affinity Designer/Photo for drawing the designs and experimenting with layout
- Cranfield Caligo safe wash (oil-based water soluble relief) inks
- Speedball soft rubber brayers (rollers for applying ink to the lino plate)
- Woodzilla lino press
- custom 3D printed scoring board (view in Tinkercad)
- embossing tool for scoring the cards
- a desktop guillotine for cutting the cards
Lessons learned
Just because you quit your job doesn’t mean you will have time or energy
I was so optimistic that we’d get the cards out on time! Little did I know that all that extra time meant I would want to experiment more.
Sometimes dreams stay dreams
Though I’m disappointed I couldn’t get glow in the dark to work this year, I have hope I’ll get it working eventually. I still really like this year’s design.
Simple is good too
This isn’t really a lesson…maybe more of a reminder. While the glow in the dark elements would have been pretty cool, I think the card as is has a cleaner overall look.